Affiliate Disclosure
Plumber Guide Guys is a participant in the Amazon Services LLC Associates Program, an affiliate advertising program designed to provide a means for sites to earn advertising fees by advertising and linking to Amazon.
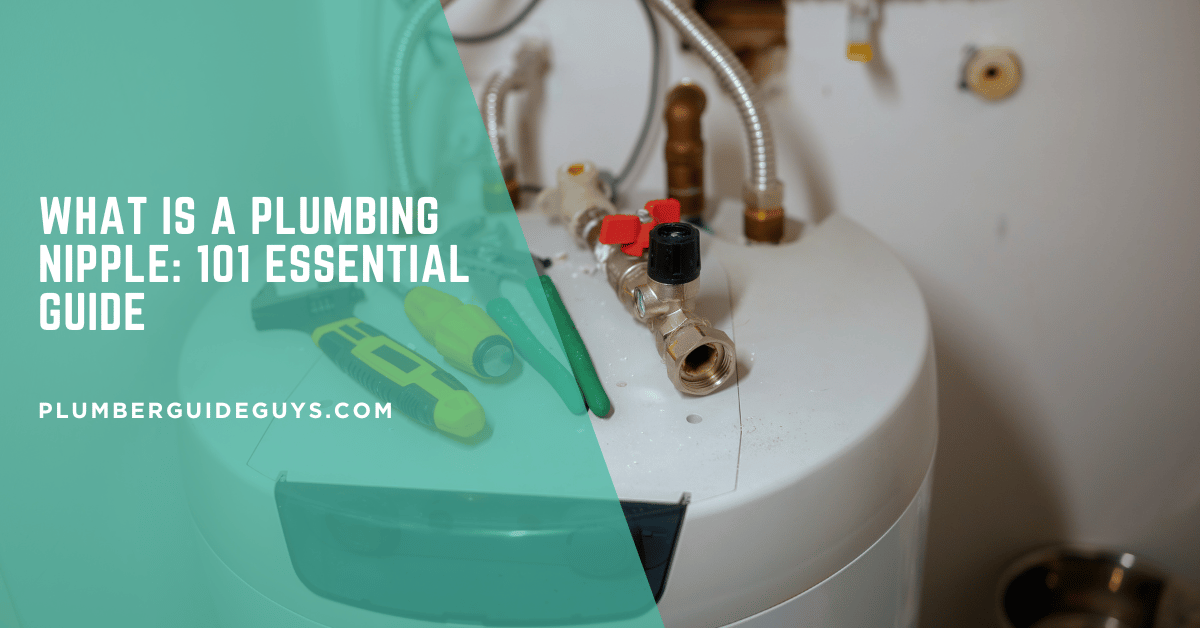
What Is a Plumbing Nipple? Ever wondered about the tiny part that connects your home’s pipes with great precision? A plumbing nipple might seem small, but it’s key to making pipe connections secure. This ensures water flows smoothly.

A pipe nipple is a short pipe with male threads on both ends. It connects pipes and fittings in plumbing systems. Knowing about plumbing nipples can save you time, money, and headaches, whether you’re DIY or a pro plumber.
These small but powerful parts are vital in water, gas, and electrical systems. They make connections efficiently. Plumbing nipples are used in both home water lines and big industrial setups. They help keep connections leak-free and reliable.
Key Takeaways
- Plumbing nipples are short pipe segments with male threads
- Used in various systems including water, gas, and electrical
- Critical for creating secure pipe connections
- Available in multiple materials and sizes
- Essential for both professional and DIY plumbing projects
What is a Plumbing Nipple
Plumbing pipe nipples are key parts of modern plumbing systems. They are often overlooked but play a big role in connecting and directing water flow. These small pieces of pipe are essential threaded fittings that help create flexible and reliable plumbing networks.
Basic Definition and Purpose
A plumbing pipe nipple is a short pipe segment with male threads on both ends. It’s designed to connect different plumbing parts. Knowing about these fittings can greatly improve your plumbing skills at home and in industries.
- Connects pipes of similar or different sizes
- Facilitates direction changes in piping
- Allows for quick and secure pipe extensions
Core Components and Design
The design of plumbing pipe nipples focuses on durability and functionality. Manufacturers cut standard pipe lengths and add precise threading to both ends. This ensures a tight and leak-free connection.
| Component | Function |
|---|---|
| Male Threads | Enables secure connection to fittings |
| Pipe Body | Provides structural integrity |
| Material | Determines corrosion resistance |
Role in Plumbing Systems
Plumbing pipe nipple uses go beyond simple connections. These versatile fittings help manage water pressure, redirect flow, and create complex piping setups in homes and businesses.
Whether it’s a small home fix or a big industrial project, knowing the role of pipe nipples is key. It helps you design more efficient and reliable plumbing systems.
Types of Plumbing Nipples Available
Plumbing nipples come in many designs for different uses in piping systems. Knowing the types helps you pick the right one for your plumbing needs. The size and length of the nipple are key to making the right choice for your project.
Barrel Nipples: Versatile Connecting Components
Barrel nipples are cylindrical and connect two pipes. They have the same diameter all the way through, perfect for straight connections. You can find them in sizes from 1/8 inch to 2 inches.
- Standard lengths: 1.5 to 6 inches
- Most common materials: Brass, galvanized steel
- Excellent for water and gas line connections
Close Nipples: Compact Joining Solution
Close nipples fit in tight spaces where you don’t need much pipe. They have threads on both ends for very close connections. They’re great for plumbing in small areas.
- Typically very short: 1/2 to 1 inch in length
- Perfect for compact piping configurations
- Ideal for minimizing possible leak points
Shoulder Pipe Nipples: Specialized Connections
Shoulder pipe nipples have a unique design with different diameters. The shoulder helps stop connections precisely, ensuring they’re secure and accurate. These nipples are essential for projects needing specific alignment and connections.
“Selecting the right plumbing nipple is as much about precision as it is about functionality.” – Professional Plumbing Expert
When picking a nipple, think about your project’s needs, the standard lengths, and the application. This ensures the best performance and reliability.
Common Materials Used in Pipe Nipples
Choosing the right materials for pipe nipples is key for lasting performance. Pipe nipples are made from several materials, each suited for different needs.
The most common materials for pipe nipples include:
- Brass: Known for excellent corrosion resistance and durability
- Galvanized steel: Offers robust protection against rust
- Stainless steel: Provides superior strength and longevity
- Plastic: Lightweight and cost-effective for specific uses
Brass vs galvanized nipples have their own benefits. Brass nipples are great for water systems because they resist mineral buildup and corrosion well. They cost more but work well in homes and businesses.
Galvanized nipples have a zinc coating to fight rust. They’re cheaper and good for outdoor and industrial use. Your project needs will help decide which material is best.
Selecting the right material can significantly impact the longevity and efficiency of your plumbing system.
Think about the environment, water quality, temperature, and pressure when picking pipe nipples. This will help you make the best choice for your plumbing project.
Understanding Pipe Nipple Measurements
Getting the right measurements is key when working with plumbing nipples. The correct size is vital for a good installation and to avoid leaks or connection problems.

Measuring pipe nipples involves looking at length, diameter, and thread engagement. Each of these is important for making strong plumbing connections.
Length Measurements
When measuring, focus on the total length from one end to the other. This includes both the threaded and non-threaded parts of the pipe nipple.
- Measure from external thread end to external thread end
- Use a precise measuring tape or caliper
- Account for both threaded and smooth sections
Diameter Specifications
Diameter measurements are key for pipe fitting connections. You need to know both the inner and outer diameters to pick the right nipple.
| Nominal Pipe Size | Outer Diameter (inches) | Inner Diameter (inches) |
|---|---|---|
| 1/2 inch | 0.84 | 0.62 |
| 3/4 inch | 1.05 | 0.81 |
| 1 inch | 1.32 | 1.05 |
Thread Engagement
Thread engagement is very important for pipe connections. Proper thread engagement ensures a secure and leak-free connection. You should aim for at least three to four thread turns for a good seal.
Remember, different sizes of plumbing nipples need different measurement methods. Always check your measurements twice before connecting to ensure the best results.
Applications and Uses in Plumbing Systems
Plumbing pipe nipples are key in linking different pipe systems. They are used in homes, businesses, and factories. These fittings help solve many connection problems by making plumbing setups smooth.
Pipe nipples are used in many areas:
- Water distribution systems
- Gas line connections
- Heating and cooling infrastructure
- Industrial fluid transfer networks
- Electrical conduit installations
In homes, pipe nipples connect different materials like copper and steel. They are vital for complex plumbing setups.
In industries, pipe nipples handle tough jobs. Chemical plants, refineries, and factories use them for managing fluids and gases. The right nipple ensures connections are safe, efficient, and leak-free, even under tough conditions.
When picking a pipe nipple, think about material, pressure, and system needs. Brass, stainless steel, and galvanized nipples each have their own benefits for different uses.
Installation Techniques and Best Practices
Installing plumbing nipples needs care and the right steps. Whether you’re a DIY fan or a pro plumber, knowing how to do it right saves time and avoids leaks.
Essential Tools for Installation
Before starting, get these key tools:
- Pipe wrench
- Thread tape or pipe sealant
- Internal pipe wrench (nipple wrench)
- Clean cloth or rag
- Pipe thread compound
Step-by-Step Installation Process
- Clean the pipe threads well with a cloth
- Check for any damage or corrosion
- Apply thread compound or tape evenly
- Align the nipple with the pipe threads
- Hand-tighten the nipple first
- Use a pipe wrench for the final tightening
“Proper thread preparation is key to a leak-free connection” – Professional Plumbing Association
Pro Installation Tips
Remember these important tips when installing plumbing nipples:
- Never over-tighten connections
- Use the right thread sealant for your pipe
- Follow the manufacturer’s installation advice
Choosing good plumbing supplies and following the right steps ensures a strong, lasting connection in your plumbing.
Brass vs Galvanized Nipples: Key Differences
Choosing the right plumbing repair supplies is key. Knowing the difference between brass and galvanized nipples is important. Each material is best for different plumbing needs.
Brass nipples are great for many uses. They work well in hot water systems because they resist corrosion and last long. They’re perfect for indoor plumbing where water and temperature can change.
- Brass Nipples Advantages:
- Excellent corrosion resistance
- Superior performance in hot water systems
- Long-lasting durability
Galvanized nipples have a zinc coating to fight rust and corrosion. They’re good for outdoor use and systems that don’t handle drinking water. They’re cheaper but don’t last as long as brass nipples.
- Galvanized Nipples Characteristics:
- Zinc coating for rust protection
- Cost-effective option
- Best for outdoor and non-potable water applications
When picking between brass and galvanized nipples, think about your project’s needs. Consider the water temperature, where it’s used, and your budget. This will help you choose the best option.
Maintenance and Replacement Guidelines
Keeping your plumbing nipples in good shape is key to a long-lasting plumbing system. Regular care helps avoid expensive repairs and unexpected problems with your home’s water system.

Recognizing Signs of Wear and Damage
Spotting issues with your plumbing nipples early can save you a lot of time and money. When checking your plumbing repair supplies, look out for these important signs:
- Visible corrosion or rust on the nipple surface
- Persistent water leaks around pipe connections
- Difficulty removing or tightening the nipple
- Unusual discoloration or mineral buildup
- Reduced water pressure in specific sections
Preventive Maintenance Strategies
To keep your plumbing system in top shape and learn how to install plumbing nipples right, try these tips:
- Do quarterly visual inspections of all pipe connections
- Use the right pipe sealants during installation
- Clean nipples often to stop mineral buildup
- Replace nipples showing clear signs of wear
- Make sure to install them correctly
Experts say to replace nipples every 5-7 years or sooner if they show a lot of wear. By being proactive and doing regular maintenance, you can make your plumbing system last longer and avoid sudden breakdowns.
Safety Considerations and Pressure Ratings
It’s important to know about safety when using plumbing pipe nipples. The right pressure ratings help ensure your plumbing system works well and safely.
- Material strength and durability
- Temperature resistance
- Pressure handling capabilities
- Pipe system specifications
Pressure ratings show the highest stress a pipe nipple can handle without breaking. Different materials and designs affect these ratings a lot.
| Material | Typical Pressure Rating | Temperature Range |
|---|---|---|
| Brass | 150-300 PSI | -20°F to 200°F |
| Stainless Steel | 300-500 PSI | -50°F to 250°F |
| Galvanized Steel | 125-250 PSI | -20°F to 180°F |
Always check pipe fitting connections for weak spots. Choosing and installing the right ones is vital to avoid system failures. If you’re unsure, talk to a professional plumber for help with complex pressure needs.
Safety first: Never compromise on quality when selecting pipe nipples for your plumbing system.
Common Installation Mistakes to Avoid
Installing plumbing nipples needs precision and careful attention. Many DIY fans and even pros make big mistakes. These mistakes can harm the plumbing system’s integrity.
When you learn to install plumbing nipples, avoid these common mistakes:
- Incorrect Measurement: Always double-check your measurements before cutting or installing pipe nipples. Even a small mistake can cause big fitting problems.
- Neglecting Thread Engagement: Proper thread engagement is key for a secure and leak-free connection.
- Choosing the Wrong Material: Pick plumbing repair supplies that fit your system’s needs.
- Over-tightening Connections: This can damage threads and create weak points in your piping system.
Choosing the right plumbing repair supplies is key. Look at material compatibility, thread specs, and the nipple’s use. Brass and galvanized nipples work differently in different places.
Professional tip: Always use the right sealants and take your time. Rushing can lead to costly mistakes, like leaks or system failures.
Precision is the key to successful plumbing nipple installation.
Conclusion
Knowing what a plumbing nipple is is more than just basic knowledge. It’s about making sure your pipes work well and last long. These small parts are key in linking pipes, controlling water flow, and keeping structures strong.
Exploring the uses of plumbing pipe nipples shows how important it is to pick the right one for each job. Every choice, from the material to the size, affects the strength and safety of the connection. The guide to pipe nipples highlights the need for careful planning in plumbing.
With the knowledge from this article, you can avoid mistakes, save money on repairs, and improve your plumbing’s performance. Whether you’re a pro plumber or a DIY fan, knowing about plumbing nipples will help you do your job better.
Knowledge is your best asset. Spend time learning about these important parts. This way, you’ll be ready to build strong, efficient, and lasting plumbing systems.