Affiliate Disclosure
Plumber Guide Guys is a participant in the Amazon Services LLC Associates Program, an affiliate advertising program designed to provide a means for sites to earn advertising fees by advertising and linking to Amazon.
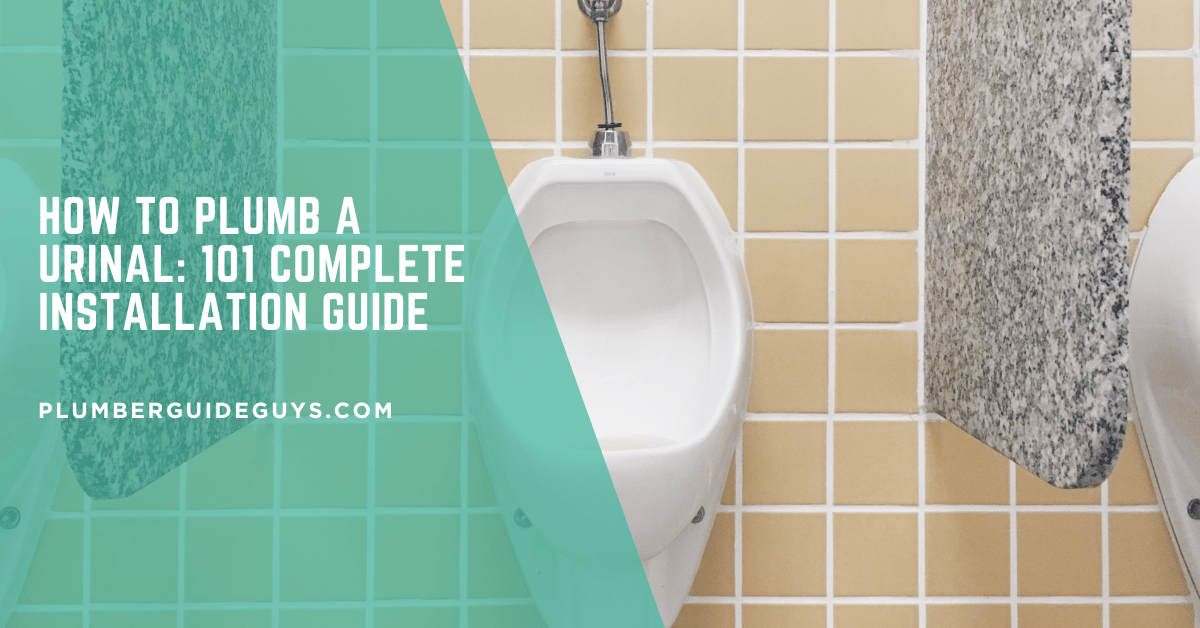
How to Plumb a Urinal? Ready to upgrade your bathroom with a water-saving urinal? Installing a urinal might seem hard, but with the right help, you can do it yourself.

Urinals are not just for offices anymore. Homeowners are adding them to save water and make bathrooms more efficient. Learning to install a urinal can really help with these goals.
This guide will cover everything you need to know about installing a urinal. You’ll learn about plumbing basics, choosing the right equipment, and how to install it. You’ll be ready to take on this home improvement project.
Key Takeaways
- Urinal installation offers water-saving benefits for residential spaces
- Basic plumbing knowledge is essential for successful installation
- Proper planning and preparation are key for a smooth process
- Different urinal types fit various bathroom setups
- Getting professional advice can make complex steps easier
Table of Contents
Understanding Urinal Plumbing Basics for Residential Installation
Installing a urinal at home needs careful thought about key plumbing parts. First, you must grasp the basics of urinal plumbing systems. This ensures they work well and efficiently.
Key Components of a Urinal Plumbing System
A urinal plumbing system has vital parts that work together:
- Urinal fixture
- Water supply line connection
- Drain pipe system
- Flush valve or flushometer
- Mounting hardware
- Ventilation pipes
Water Supply Requirements and Specifications
The water supply line is key for flushing. Most homes need specific water pressure and pipe size for it to work right.
| Specification | Typical Residential Requirements |
|---|---|
| Supply Line Size | 1/2 inch |
| Water Pressure | 25-80 PSI |
| Flow Rate | 1-2 gallons per flush |
Drain Line and Ventilation Considerations
Connecting the drain line right is key for cleanliness and avoiding plumbing problems. Make sure the drainage slope and pipe size are correct for waste removal.
Pro Tip: Always check local plumbing codes for specific urinal installation rules in your area.
Ventilation is also very important. Good venting stops sewer gas buildup and ensures smooth drainage. A 2-inch drain pipe with a 1/4 inch per foot slope is best for home urinals.
Legal Considerations and Plumbing Code Requirements for Urinals
Installing a urinal at home means you have to follow certain plumbing rules. These rules change from place to place. It’s important to know these laws to do it right.
Local building offices have strict rules for putting in urinals. The plumbing code for urinals covers a few key points you need to think about before you start:
- Get the right permits from local offices
- Make sure you follow the International Plumbing Code (IPC)
- Check the local water-saving rules
- Make sure there’s enough space around the fixture
Different places have their own rules for installing urinals. Some important things to keep in mind include:
| Code Requirement | Typical Specifications |
|---|---|
| Minimum Fixture Clearance | 21 inches from other fixtures |
| Water Consumption | Can’t use more than 0.5 gallons per flush |
| Drain Line Size | Must be at least 1.5 inches |
Waterless urinals add more complexity to the plumbing rules. Some places have special rules about graywater and keeping the trap seal clean. Getting help from a pro is key to understanding these rules.
Before you start, call your local building office to check the plumbing code for urinals in your area. This helps avoid legal problems and makes sure your installation is safe and meets all the standards.
Choosing the Best Urinal Type for Your Home
Choosing the right urinal for your home is important. It affects water use, upkeep, space, and looks. Knowing the different types helps you pick the best one for you.
Wall-hung urinals are great for saving space. They’re perfect for small bathrooms or half-baths. They offer:
- Modern design
- Easy floor cleaning
- Adjustable height
- Less space than regular fixtures
Waterless Urinal Plumbing Systems: An Eco-Friendly Alternative
Waterless urinals are a new way to fix bathrooms. They don’t need water to flush, using special liquids. Benefits include:
- Save up to 45,000 gallons of water a year
- Less mechanical parts
- Good for eco-friendly homes
- Need less upkeep
Comparing Urinal Installation Options
Choosing between floor and wall-mounted urinals depends on several things. Look at this comparison to decide what’s best for you:
| Feature | Floor-Mounted | Wall-Mounted |
|---|---|---|
| Space Requirements | Takes up more space | Uses little floor space |
| Installation Complexity | Easier to mount | Needs wall support |
| Cleaning Accessibility | Harder to clean | Easier to clean the floor |
Your ideal urinal depends on your bathroom, water goals, and what you like. Think about each option to find the best for your home.
Essential Tools and Materials for Urinal Installation
Starting a commercial bathroom plumbing project needs careful planning and the right tools. You must gather all necessary tools and materials before beginning.
To ensure a smooth installation, you’ll need a wide range of tools. This includes both basic and specialized tools:
- Basic Hand Tools:
- Adjustable wrench
- Pipe wrench
- 24-inch level
- Measuring tape
- Pencil and marker
- Utility knife
- Specialized Plumbing Tools:
- Pipe cutters
- Basin wrench
- Tubing cutter
- Hole saw or drill bits
Safety is key in commercial bathroom plumbing. Always wear protective gear such as:
- Safety glasses
- Work gloves
- Dust mask
Here’s what you’ll need for your urinal installation:
- Urinal fixture
- Mounting brackets
- 1/2-inch supply lines
- Shutoff valve
- 2-inch drain pipes
- P-trap or integral trap
- Flush valve or flushometer
- Mounting hardware
Pro tip: Always buy extra materials and have a backup plan. This helps avoid delays in commercial bathroom plumbing projects.
Preparing Your Bathroom Space for Urinal Plumbing
Installing a urinal needs careful planning and preparation. Your plumbing project demands attention to detail for the best results. The right preparation can make your installation a success or a costly mistake.
Before starting, you must consider several important factors. These factors will help you set up your urinal smoothly and efficiently.
Selecting the Optimal Location
Finding the perfect spot for your urinal is key. You need to think about:
- Proximity to existing drain lines
- Accessibility and user comfort
- Available wall space and structural integrity
- Clearance requirements (minimum 12-15 inches from adjacent fixtures)
Assessing Existing Plumbing Infrastructure
Look closely at your plumbing system. Check:
- Main drain stack location
- Nearby water supply lines
- Available venting options
- Drain slope adequacy
- Water pressure for proper flushing
Wall Reinforcement and Support Requirements
Wall-hung urinals need strong support. Typical wall-mounted urinals can weigh between 50-100 pounds when in use. It’s important to prevent structural failures.
Here are some support strategies:
- Install blocking between wall studs (2×6 or 2×8 lumber)
- Secure blocking to multiple studs for maximum stability
- Explore commercial-grade carrier systems for additional support
By preparing your bathroom well for urinal installation, you’ll ensure a successful and lasting fixture. It will improve your bathroom’s functionality.
How to Plumb a Urinal: Step-by-Step Installation Process

Learning to plumb a urinal needs careful planning and precise steps. The process involves several key steps to ensure a professional installation.
Start by gathering all the tools and materials you need. Good preparation and knowing the specific steps for plumbing a urinal are key to success.
- Measure and Mark Installation Area
- Determine precise mounting height
- Mark centerline position
- Identify supply and drain connection locations
- Prepare Wall Opening
- Cut access for drain and supply pipes
- Protect surrounding areas with drop cloths
- Control dust during cutting
- Install Mounting Hardware
- Attach blocking or mounting bracket
- Ensure solid attachment points
- Verify structural support
Rough-in plumbing is a critical phase in plumbing a urinal. Proper pipe installation is key for long-term functionality and performance.
“Precision in plumbing installation prevents future problems.” – Professional Plumbing Experts
When installing, run drain pipes with the right slope, connect water supply lines, and ensure proper ventilation. Test the plumbing before closing the walls to catch any problems early.
| Installation Stage | Key Considerations |
|---|---|
| Rough-in Plumbing | Proper slope, leak-free connections |
| Mounting | Level alignment, secure attachment |
| Final Connections | Tight seals, functional testing |
The last steps involve placing the urinal correctly, securing it, and testing it thoroughly. This ensures it works perfectly.
Connecting the Urinal Water Supply Line
Setting up a urinal water supply line needs careful planning and precision. Your plumbing project requires attention to detail for proper water flow and long-term use. Knowing the key steps for water supply connection is vital for a professional installation.
The success of your urinal installation depends on the right parts and correct connection methods. Your water supply line must be strong and set up right for consistent flushing.
Installing the Shutoff Valve
Choosing the right shutoff valve is key for your urinal water supply line. Consider these important factors when picking and installing your valve:
- Go for a quarter-turn ball valve for reliable use
- Put the valve 6-12 inches from the fixture for easy reach
- Use Teflon tape on threaded connections to stop leaks
- Make sure to tighten properly without over-stressing the parts
Proper Pipe Sizing and Connection Methods
Your urinal water supply line needs careful thought on pipe materials and connection methods. Different options have their own benefits:
| Pipe Material | Pros | Installation Difficulty |
|---|---|---|
| Copper | Durable, traditional | Moderate (needs soldering) |
| PEX | Flexible, easy to work with | Easy |
| CPVC | Rigid plastic, corrosion-resistant | Easy (glued connections) |
When connecting your urinal water supply line, focus on pipe measurement, cutting, and securing. Make sure to support your pipes well to avoid movement and noise. Choose flexible supply tubes that fit your urinal needs and ensure secure, leak-free connections.
Urinal Drain Pipe Connection and Trap Installation
Connecting your urinal’s drain pipe needs precision and planning. The trap installation is key for waste removal and keeping sewer gases out. Most homes use a 2-inch drain pipe, but local codes might differ.
When setting up for urinal drain pipe connection, focus on a few important points:
- Keep the drain slope right (1/4 inch drop per foot)
- Choose the right drainage fittings
- Make sure the trap is set up correctly
The trap is vital in your urinal’s drainage system. P-traps are common for wall-mounted urinals, keeping bad smells out. When installing the trap, pay attention to these details:
- Check the trap arm length and slope
- Verify the trap weir height
- Make sure it’s vented right
Waterless urinals need a different trap setup. These systems use special cartridges with unique seals. Follow the manufacturer’s instructions closely for proper installation and to avoid odors.
Professional tip: Always check local plumbing codes before finishing your urinal drain pipe connection. This ensures you meet all requirements and get the best results.
Picking the right connection method is key for a good trap installation. Use fittings like sanitary tees or wyes for PVC, ABS, or cast iron pipes. This creates a secure and efficient drainage system.
Urinal Flushometer Installation and Configuration
Installing a urinal flushometer needs careful thought. You must consider many factors for the best performance and water use. Your choice between manual and sensor-flush systems affects the installation and how well it works over time.

When installing a urinal flushometer, it’s important to know the differences between manual and automated systems. Each has its own benefits for your bathroom.
Manual vs. Sensor-Flush Systems
- Manual Flush Systems:
- Lower initial cost
- No electrical connections needed
- Simple to operate
- Reliable with fewer parts to fail
- Sensor-Flush Systems:
- Touchless for better hygiene
- Can save water with programming
- Needs electricity or batteries
Water Pressure and Flow Rate Adjustment
Getting the water pressure right is key for a good urinal flushometer installation. Most systems work best with 15-80 PSI. The best range is 25-50 PSI for the best results.
| Pressure Range | Flush Performance | Water Usage |
|---|---|---|
| 15-25 PSI | Weak Flush | Insufficient Cleaning |
| 25-50 PSI | Optimal Performance | Efficient Cleaning |
| 50-80 PSI | Potential Splash | Water Waste |
Pro Tip: Use a pressure gauge to check your water supply. Adjust the control stop for the right flow. Modern flushometers use 0.5-1.0 gallons per flush.
“Proper flushometer installation balances water conservation with effective waste removal.” – Plumbing Professionals Association
Testing Your Urinal Installation for Leaks and Functionality
After you’ve installed your urinal, it’s important to test it well. This ensures it works right and doesn’t leak. Testing helps avoid water damage and expensive fixes later on.
- Look over all connections for any signs of leaks.
- Make sure pipes are straight and sealants are applied right.
- Check that fittings are tightened correctly.
- Look for any spots where leaks might happen.
Start by slowly turning on the water. Watch for any moisture or drips at the connections. Be extra careful around:
- Supply line connections
- Flushometer inlet
- Trap seal area
- Surrounding wall surfaces
Next, do a static pressure test. Keep the water pressure on for 15-30 minutes. Use paper towels to detect even microscopic leaks. Also, listen for odd sounds that might mean venting issues or loose parts during flushing.
If you find leaks, tighten the connections gently but firmly. If problems keep coming back, you might need a pro to fix it or replace parts. This ensures your urinal plumbing system is strong and reliable.
Maintenance Tips for Long-Term Urinal Performance
To keep your waterless urinal plumbing system working well, you need to take care of it regularly. Proper maintenance helps it perform at its best and lasts longer.
There are a few important steps to keep your waterless urinal plumbing in good shape. These steps help avoid problems and keep your system running smoothly:
- Perform daily surface cleaning with non-acidic cleaners
- Inspect for any signs of mineral buildup or residue
- Check drain flow and trap functionality
- Monitor sealant liquid levels
Cleaning and Sanitization Best Practices
When cleaning your waterless urinal, use the right techniques. Choose cleaning solutions made for urinals. Avoid harsh chemicals that can harm the seals or inside parts.
- Clean the entire surface thoroughly
- Use a dedicated urinal brush
- Rinse completely with water
- Wipe down exterior surfaces
Waterless Urinal Cartridge Maintenance
The cartridge is key to your waterless urinal’s plumbing. Replacing it regularly stops odors and keeps it working right:
- Replace cartridges every 1-3 months
- Check for debris or residue during replacement
- Ensure proper seating of new cartridges
- Use manufacturer-recommended sealant liquid
By sticking to these maintenance tips, your waterless urinal will stay in great shape. This prevents expensive fixes and keeps your bathroom clean and healthy.
Conclusion
Learning to plumb a urinal is a big win in home improvement. You’ve picked up skills that go beyond one project. Installing a urinal needs careful planning, technical know-how, and exact steps.
Your skills in how to plumb a urinal let you face tough plumbing tasks with confidence. You now know plumbing basics, local codes, and how to choose the right fixtures. You also know how to install like a pro.
While DIY urinal installation is fulfilling, know your limits. Some jobs need a pro to ensure safety and follow codes. Your dedication and attention to detail will help in future projects, whether you do them yourself or get help.
Your new urinal is more than a bathroom item. It shows your growing skills, water-saving efforts, and desire to improve your home. With the right care, this installation will serve you well for years.