Affiliate Disclosure
Plumber Guide Guys is a participant in the Amazon Services LLC Associates Program, an affiliate advertising program designed to provide a means for sites to earn advertising fees by advertising and linking to Amazon.
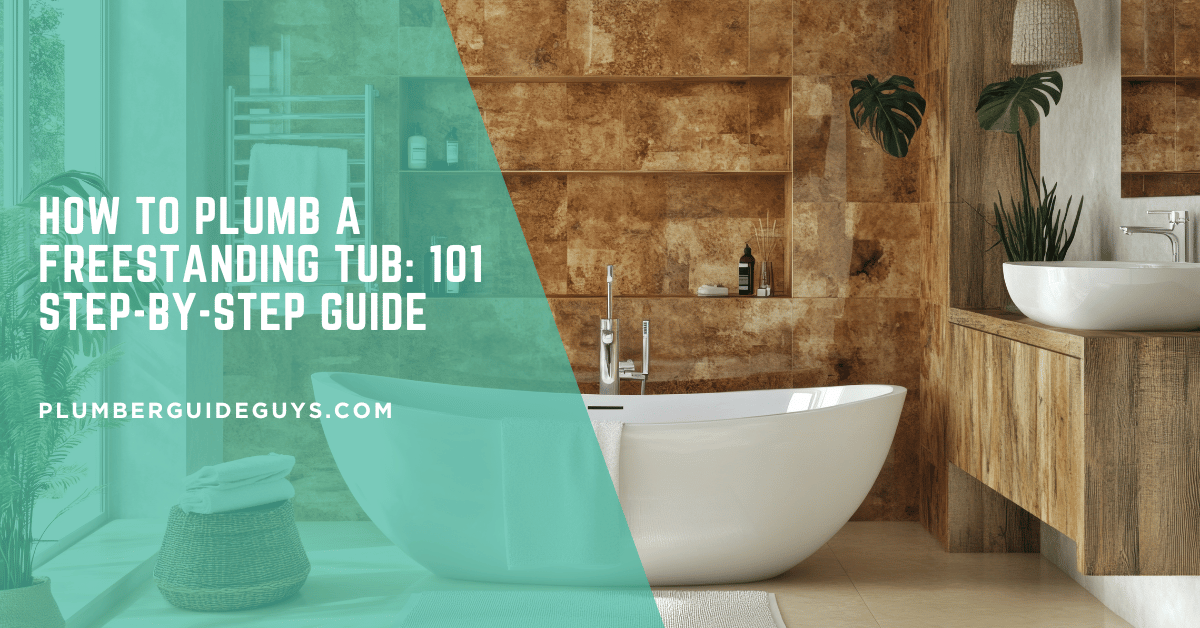
How to Plumb a Freestanding Tub? Ever wondered why plumbers charge more for freestanding tubs? It’s because they use special plumbing skills to make your bathroom luxurious.

Installing a freestanding tub is more than just putting it in your bathroom. It needs careful planning, special tools, and plumbing knowledge. This guide will show you how to install a freestanding bathtub easily.
Whether you’re doing it yourself or getting a pro, knowing about tub plumbing saves time and money. It also avoids installation problems.
Key Takeaways
- Proper planning is key for a successful installation
- Special tools and knowledge are needed
- Knowing about plumbing parts helps avoid mistakes
- Getting professional help makes it easier
- Accurate measurements and preparation are essential
Table of Contents
Essential Tools and Materials for Freestanding Tub Installation
Getting ready for a freestanding tub installation needs careful planning and the right supplies. Having the right tools and materials before starting is key. It ensures a smooth and successful project. Your preparation is essential for a professional-quality bathroom upgrade.
Plumbing Tools You’ll Need
For a professional installation, you need specific tools for a freestanding bath waste overflow system. Here’s a list of essential plumbing tools:
- Adjustable pipe wrench
- Basin wrench
- Pipe cutter
- Level
- Tape measure
- Hacksaw
- Plumber’s tape
- Teflon tape
Required Materials and Supplies
| Category | Specific Items |
|---|---|
| Pipes | Copper or PEX water supply lines |
| Fittings | Drain assembly, P-trap, overflow kit |
| Sealants | Silicone caulk, plumber’s putty |
| Connection Materials | Compression fittings, pipe connectors |
Safety Equipment Checklist
Protecting yourself during installation is very important. Make sure to have the following safety gear:
- Safety glasses
- Work gloves
- Knee pads
- Dust mask
By choosing the right bathtub plumbing supplies and tools, you’ll be ready to install the freestanding bath waste overflow system confidently.
Preparing Your Bathroom Space for Installation
Getting ready for a freestanding bathtub needs careful planning. Start by measuring your bathroom to see if it fits the new tub and plumbing. Make sure you have enough room for everything.
Before you start, make a list of things to do:
- Clear the entire bathroom area completely
- Verify floor structural integrity
- Check existing plumbing connections
- Measure precise dimensions for tub placement
Your floor must be strong enough to hold the tub’s weight. Check the subfloor for any damage. Reinforcement might be necessary to avoid future problems. Be careful around where water and drain lines meet the tub.
Think about the plumbing needs for your bathtub. You’ll need to find the right spots for water and drain lines. Some bathrooms might need changes to fit your new tub’s plumbing.
Pro tip: Always consult with a professional plumber to ensure your bathroom space meets all technical requirements for a successful installation.
Understanding Freestanding Tub Plumbing Components
Exploring freestanding tub plumbing means knowing its key parts. To install a clawfoot tub right, you must grasp each essential piece. These parts are vital for a system that works well and doesn’t leak.
Getting a freestanding tub drain to work well depends on the plumbing parts. These parts must work together smoothly.
Critical Plumbing Components Breakdown
Your freestanding tub’s plumbing system has several important parts. These parts are key for water to flow right and drain well:
- Drain assembly
- Overflow system
- Water supply lines
- P-trap configuration
- Waste line connections
Drain and Overflow System Essentials
The drain and overflow system stops water spills and manages water well. How well it’s installed affects its performance.
| Component | Function | Key Consideration |
|---|---|---|
| Drain Assembly | Water removal | Proper alignment and seal |
| Overflow Mechanism | Prevent water overflow | Correct height placement |
Water Supply Line Configuration
Setting up water supply lines needs careful planning and exact measurements. The tub’s spot and how close it is to plumbing affects the setup.
“Proper water line configuration is the backbone of a successful freestanding tub installation.” – Professional Plumbing Expert
P-Trap and Waste Line Insights
The P-trap is key to keep sewer gases out of your bathroom. When installing a clawfoot tub, a correctly placed P-trap is essential.
Knowing these parts helps you install a freestanding tub drain smoothly. It’s a step towards a beautiful and useful bathroom upgrade.
How to Plumb a Freestanding Tub
Plumbing a freestanding tub needs careful planning and precise steps. You must follow a systematic approach for proper installation and function.

Start by gathering all tools and materials needed. The main steps for plumbing a freestanding tub include:
- Measure and mark the exact spot for your tub
- Prepare the floor and existing plumbing connections
- Place the tub in the right spot
- Align drain and water supply connections
- Check if the tub is level and stable
Your main goal is to create a solid base for the tub. Proper alignment is key to avoid plumbing problems later. Double-check measurements and ensure connections fit right before making them permanent.
Experts say to focus on these important points when plumbing a freestanding tub:
- Make sure the floor is strong enough
- Check if the water pressure is right
- Verify the drain slope and alignment
- Use top-quality plumbing materials
Even though it might seem tough, with careful prep and methodical work, you can plumb your freestanding tub well. Remember, being precise during installation avoids water damage and saves on repair costs.
Installing the Drain and Overflow Assembly
Installing the drain and overflow assembly right is key for your freestanding tub’s life and performance. A good installation stops water damage and keeps everything working well.
The drain and overflow assembly does two main things: it takes water out of the tub and stops it from overflowing. It’s important to install it with care to avoid leaks.
Preparing for Drain Assembly Installation
- Clean the drain opening thoroughly
- Inspect all components for damage
- Gather necessary tools and materials
- Verify compatibility with your specific tub model
Seal Installation Techniques
Use top-notch plumber’s putty or silicone sealant for the installation. This creates a strong waterproof seal. Make sure to cover the drain opening well with the sealant.
| Sealing Material | Pros | Recommended Use |
|---|---|---|
| Plumber’s Putty | Flexible, easy to apply | Metal drain assemblies |
| Silicone Sealant | Waterproof, long-lasting | Modern tub materials |
Leak Testing Process
Do a thorough leak test after installing the drain. Fill the tub with water and watch the connections closely. Look for any moisture or leaks around the drain and overflow.
Connecting to Main Drain Line
Attach the drain assembly to your home’s main drain line with the right fittings. Make sure all connections are tight and right to avoid water problems.
Pro tip: Always follow manufacturer guidelines and local plumbing codes when performing a freestanding tub drain installation.
Water Supply Line Connection Guide
Connecting water lines to a freestanding tub needs careful planning and precise steps. Your success depends on choosing the right materials and knowing your bathroom’s plumbing needs.
When getting ready for copper pipe installation for bathtubs, consider a few key factors:
- Pipe diameter and material compatibility
- Water pressure requirements
- Distance from main water supply
- Local building code regulations
Pro tip: Always measure twice and cut once when working with copper piping to ensure a perfect fit.
“Proper water line connection is the foundation of a reliable bathtub installation.” – Professional Plumbing Association
Your water supply lines must be the right size for optimal water flow. Copper pipes are the top choice for durability and performance in bathrooms. They resist corrosion and ensure long-lasting connections that keep water quality high.
Key steps for connecting water lines to a freestanding tub include:
- Shut off the main water supply
- Clean and prepare pipe surfaces
- Apply flux to pipe connections
- Solder joints carefully
- Test connections for leaks
Professional plumbers suggest using flexible supply lines with compression fittings for easier installation and maintenance. These connections offer extra flexibility while ensuring a secure water supply to your freestanding tub.
Setting Up the P-Trap and Waste System
Installing a p-trap for tubs is key to a working and safe bathroom plumbing system. It keeps water flowing right and stops bad sewer smells from getting in.
Getting the p-trap right is all about paying attention to the details. It’s a vital part of your bathroom’s plumbing setup.
Proper P-Trap Positioning
Getting the p-trap in the right spot is important for it to work well. Here’s what to do:
- Measure the exact distance between the tub drain and the main waste line
- Ensure a slight downward slope for proper water drainage
- Maintain a minimum 2-inch diameter for efficient waste removal
- Check for proper alignment with existing plumbing connections
Venting Requirements
Good venting is key for your p-trap to work right. Bad venting can cause drainage problems and sewer gas leaks. Here are some venting tips:
- Connect the p-trap to a vertical vent pipe
- Ensure the vent pipe extends above the roof line
- Maintain local building code requirements for vent sizing
- Avoid sharp bends or restrictive angles in the vent pipe
Final Connections
The final step is making sure all connections are tight and leak-free. Use good plumbing tape and make sure all joints are sealed well.
Pro Tip: Always double-check your connections and perform a water test to verify the p-trap’s proper installation and functionality.
By following these steps, you’ll get your p-trap for tubs set up right. This ensures your bathroom’s waste system works well.
Faucet Installation and Water Line Testing

Installing a faucet for your freestanding tub needs precision and attention to detail. You must consider the design of your faucet and tub. This ensures a proper fit.
First, gather your tools and materials. You’ll need:
- Adjustable wrench
- Plumber’s tape
- Basin wrench
- Flexible water supply lines
- Teflon tape
Before starting, check your faucet’s connection points. Different freestanding tub designs may require unique mounting approaches. Some faucets mount on the deck, while others need to be installed on the floor.
To connect water lines correctly, follow these steps:
- Clean all connection surfaces thoroughly
- Apply plumber’s tape to threaded connections
- Align faucet precisely with pre-drilled holes or mounting points
- Tighten connections securely without over-tightening
- Check for proper alignment and stability
Testing the water lines is key to finding leaks. Run water through the faucet and check all connections. Look for any signs of leaks or uneven water flow.
Pro tip: Always perform a thorough pressure test before completing your freestanding tub installation.
Securing and Leveling Your Freestanding Tub
Installing a freestanding bathtub needs careful planning. You must place it correctly and make sure it’s stable. This ensures it works well for a long time without plumbing problems.
Start by getting your bathroom floor ready for the tub. Use a bubble level to check if the floor is even. An uneven floor can harm your tub or make it unstable.
- Check floor levelness using a 4-foot level
- Identify low or high spots in the flooring
- Use shims to address minor height discrepancies
- Ensure a solid, stable foundation before final placement
Securing your bathtub involves important steps. Some tubs need special brackets or anchoring systems. Consult your manufacturer’s specific guidelines for the right way to install.
Think about these key points when leveling and securing your tub:
- Verify manufacturer’s weight distribution requirements
- Check for minimal movement or rocking
- Align tub precisely with existing plumbing connections
- Use appropriate mounting hardware for your floor type
Professional tip: Always test the tub’s stability before completing the final installation.
By carefully leveling and securing your freestanding tub, you’ll have a beautiful centerpiece in your bathroom. It will serve you well for many years.
Final Plumbing Inspection and Water Testing
Learning to plumb a freestanding tub requires a final inspection and water test. This step is key to catch problems early and avoid expensive fixes.
Begin by checking all plumbing connections carefully. Look for leaks or bad fits that could harm your tub’s performance.
- Inspect all water supply line connections
- Examine drain and overflow assembly seals
- Verify P-trap alignment and connection
- Check for any visible pipe stress or misalignment
Water testing is the final check when plumbing a freestanding tub. Run water and watch each connection closely.
| Inspection Area | What to Check | Potential Issue |
|---|---|---|
| Water Supply Lines | Tight connections, no dripping | Potential water damage |
| Drain Assembly | Proper seal, no leakage | Water seepage |
| P-Trap | Correct angle, secure mounting | Drainage problems |
Pro tip: If you notice any leaks or irregularities during your inspection, address them immediately to prevent future water damage or repair costs.
Being patient during the final inspection can save you a lot of time and money. Take your time, be thorough, and make sure every connection is secure and working right.
Conclusion
Learning to plumb a freestanding tub is a complex but rewarding project. It needs careful planning and precise execution. This guide has given you valuable insights into installing a luxurious bathroom centerpiece.
Your success depends on understanding each critical component. This includes water supply lines and drain assemblies. Proper preparation, the right tools, and rigorous testing are essential for a professional-grade installation. Remember, patience and attention to detail are key to overcoming challenges.
Regular maintenance is vital to extend your freestanding tub’s life. Check connections often, look for leaks, and fix any minor issues quickly. With the right approach, your tub will bring comfort and beauty to your bathroom for years.
If you face complex challenges or are unsure about any part of the installation, getting a professional plumber’s help is wise. Your effort to learn how to plumb a freestanding tub shows you’re proactive about home improvement. It can save you time and money in the long run.
FAQ
How difficult is it to plumb a freestanding tub by myself?
What are the most common mistakes during freestanding tub plumbing?
How long does a typical freestanding tub installation take?
What type of pipes work best for freestanding tub installations?
Do I need special permits for installing a freestanding tub?
How much does a professional freestanding tub installation cost?
FAQ
How difficult is it to plumb a freestanding tub by myself?
It depends on your DIY skills and plumbing knowledge. If you’re good at basic plumbing, you might do it yourself. But, if you’re unsure, it’s best to get a professional plumber.
What are the most common mistakes during freestanding tub plumbing?
Mistakes include wrong drain alignment and poor floor support. Also, incorrect P-trap installation and bad water line connections are common. Not following local building codes is another error.
Ignoring sealing, wrong pipe sizing, and not leveling the tub properly are also mistakes. These can cause leaks and damage.
How long does a typical freestanding tub installation take?
It usually takes 1-3 days, depending on your skills and the bathroom’s setup. Adding floor reinforcement or moving plumbing can make it longer. Professionals might finish faster.
What type of pipes work best for freestanding tub installations?
Copper and PEX pipes are top choices. Copper is durable, while PEX is flexible and resistant to corrosion. Your choice depends on local codes and your budget.
Do I need special permits for installing a freestanding tub?
It depends on where you live. Many places need a plumbing permit for big changes. Check with your local building department for specific rules. Some areas might require inspections.
How much does a professional freestanding tub installation cost?
Costs range from
FAQ
How difficult is it to plumb a freestanding tub by myself?
It depends on your DIY skills and plumbing knowledge. If you’re good at basic plumbing, you might do it yourself. But, if you’re unsure, it’s best to get a professional plumber.
What are the most common mistakes during freestanding tub plumbing?
Mistakes include wrong drain alignment and poor floor support. Also, incorrect P-trap installation and bad water line connections are common. Not following local building codes is another error.
Ignoring sealing, wrong pipe sizing, and not leveling the tub properly are also mistakes. These can cause leaks and damage.
How long does a typical freestanding tub installation take?
It usually takes 1-3 days, depending on your skills and the bathroom’s setup. Adding floor reinforcement or moving plumbing can make it longer. Professionals might finish faster.
What type of pipes work best for freestanding tub installations?
Copper and PEX pipes are top choices. Copper is durable, while PEX is flexible and resistant to corrosion. Your choice depends on local codes and your budget.
Do I need special permits for installing a freestanding tub?
It depends on where you live. Many places need a plumbing permit for big changes. Check with your local building department for specific rules. Some areas might require inspections.
How much does a professional freestanding tub installation cost?
Costs range from $1,000 to $5,000, based on complexity. The price changes with bathroom layout, plumbing, and faucet type. Get quotes from licensed plumbers for a better idea.
What tools are essential for a freestanding tub installation?
You’ll need a pipe cutter, adjustable wrench, and level. Also, a tape measure, drill, hacksaw, and plumber’s tape are must-haves. Don’t forget safety glasses and screwdrivers. You might also need a tubing bender and pipe threading tool.
How do I ensure my bathroom floor can support a freestanding tub?
Check your floor’s structure by looking at floor joists. Consider the tub’s weight when full. You might need to reinforce the subfloor. A structural engineer or contractor can help evaluate the floor’s strength.
What maintenance is required after installing a freestanding tub?
Regular checks for leaks and pipe connections are important. Clean the drain and overflow systems and ensure caulking is good. Check water supply lines and drain assemblies yearly. Use water softeners or clean with safe products to prevent mineral buildup.
Can I install a freestanding tub in an older home with outdated plumbing?
Yes, but it’s a big job. Older homes might need plumbing updates. You’ll likely have to change water lines and ensure proper venting. A professional plumber can help figure out what’s needed.
,000 to ,000, based on complexity. The price changes with bathroom layout, plumbing, and faucet type. Get quotes from licensed plumbers for a better idea.
What tools are essential for a freestanding tub installation?
You’ll need a pipe cutter, adjustable wrench, and level. Also, a tape measure, drill, hacksaw, and plumber’s tape are must-haves. Don’t forget safety glasses and screwdrivers. You might also need a tubing bender and pipe threading tool.
How do I ensure my bathroom floor can support a freestanding tub?
Check your floor’s structure by looking at floor joists. Consider the tub’s weight when full. You might need to reinforce the subfloor. A structural engineer or contractor can help evaluate the floor’s strength.
What maintenance is required after installing a freestanding tub?
Regular checks for leaks and pipe connections are important. Clean the drain and overflow systems and ensure caulking is good. Check water supply lines and drain assemblies yearly. Use water softeners or clean with safe products to prevent mineral buildup.
Can I install a freestanding tub in an older home with outdated plumbing?
Yes, but it’s a big job. Older homes might need plumbing updates. You’ll likely have to change water lines and ensure proper venting. A professional plumber can help figure out what’s needed.